Flooring Debate

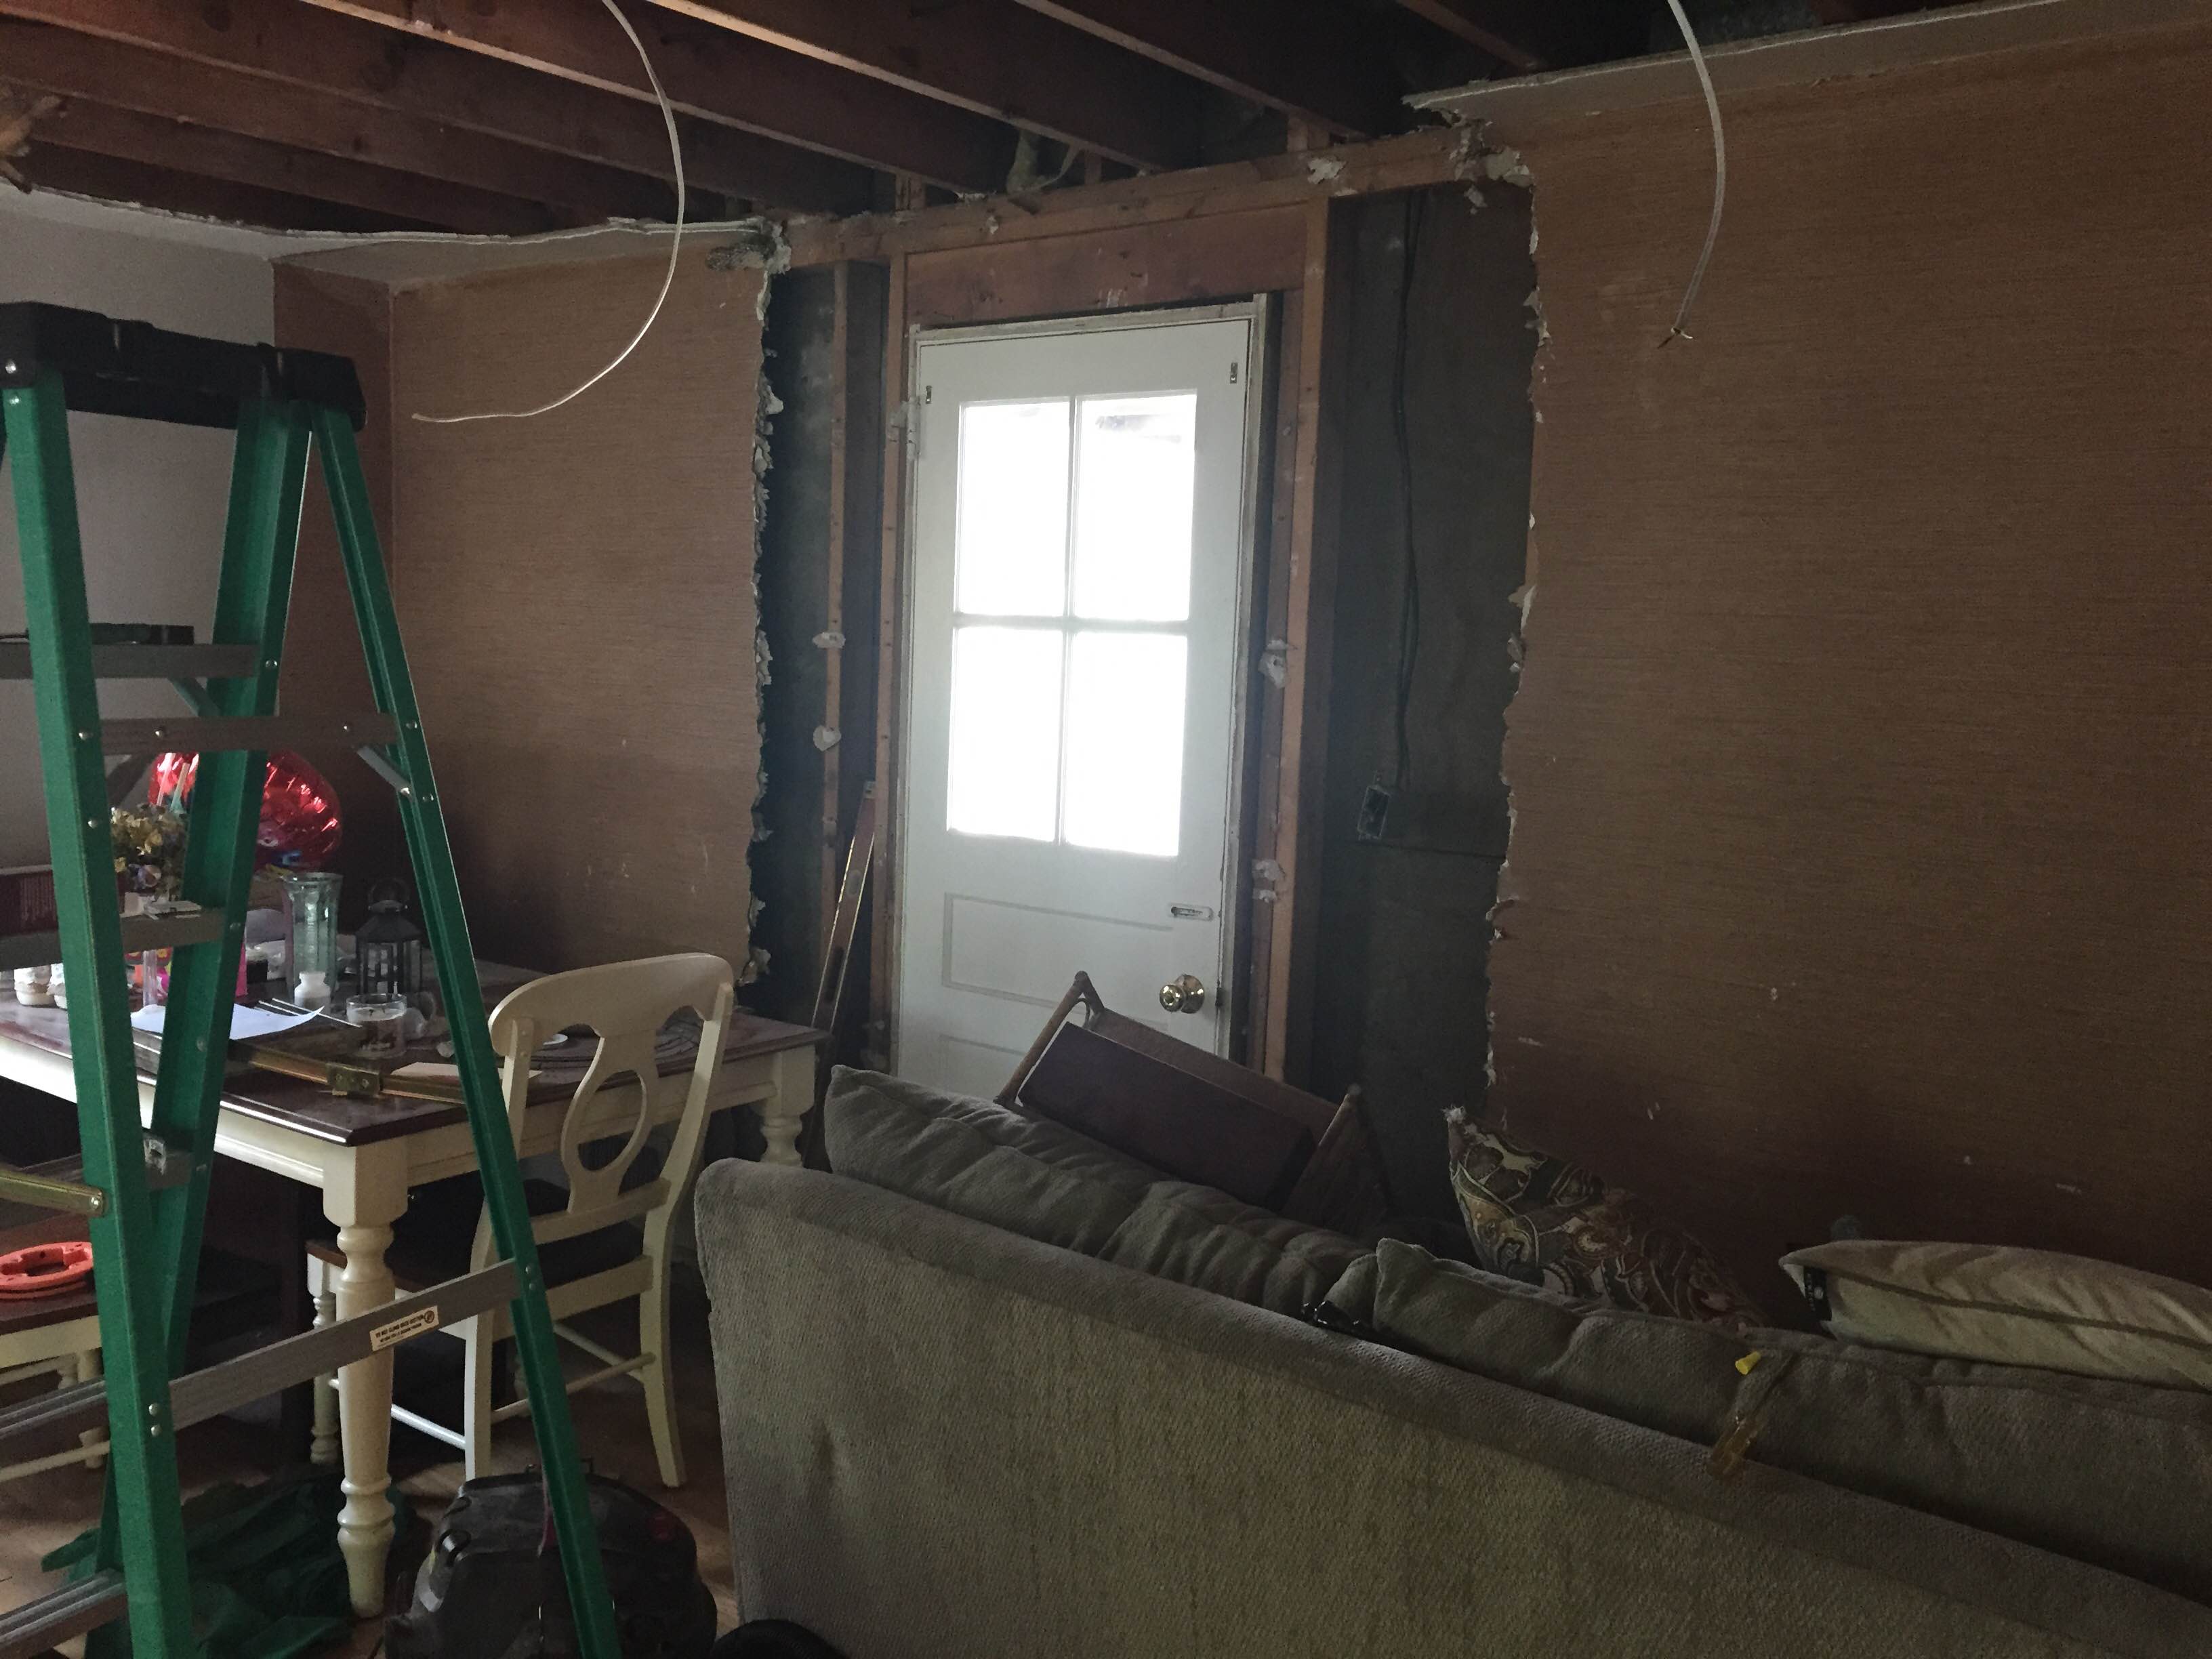
So I have about a billion projects I need to go back and write up, including a post that is about 85% finished about the work we are doing upstairs to prepare for bringing home our baby in T-minus 6 weeks (gah!), but I decided to take a minute to lay out some thoughts on the current debate we are having regarding what to do about our flooring.  We have hardwood throughout the downstairs and upstairs (except for the kitchen and bathrooms).  In the midst of some structural work we did last spring that required jacking up the ceiling in the living room, two boards in the middle of the bedroom above separated/split a bit.  That, coupled with some legacy water damage from before we lived here, other normal wear & tear that you would expect from original flooring from 1948, and the fact that we aren’t in love with the color/finish made us add refinishing & fixing the flooring in the bedrooms & hallway upstairs to the list of must-dos prior to baby arriving.

IMG_3220

Gap/damage from structural work below

IMG_3221

Legacy water damage

Fast forward to now, where we are weeks away from bringing home our little one.  We decided that sanding, staining and applying poly would be best left to the professionals so we had a few contractors in for quotes for a two-phase job, starting with the upstairs and staircase and then coming back to do the downstairs at a later date (perhaps sometime this spring or summer).  Two of four never actually provided us pricing (I guess business is booming?! Either that or people are just extremely unprofessional).  One of the two quotes we did receive was from a well-established & professional local company, was significantly higher than the other (almost double).  The rep that came to give the quote actually said that he wanted to get his foreman to the house to take a look because he wasn’t sure about the shape of the floors- specifically whether there was sufficient space left above the side fastening features (not really traditional tongue-in-groove) to really be able to sand and refinish, without having to replace a significant amount/have a lot of gaps and issues.  The other estimate came in, and the guy seemed reputable but I always get nervous going with a lower estimate and ending up paying for it down the line if issues arise.  My worries were, of course, heightened by the fact that he didn’t mention any of the concerns the other person brought up.  We already have anxiety about hiring people to come in to do work vs. rolling up our own (Mike’s) sleeves, so it wasn’t making our decision any easier.

I was talking to a few coworkers about the whole ordeal, and one woman I work with suggested that if the floors weren’t historical/I wasn’t attached to them, it might make sense to replace them instead of refinishing them.  I thought about it for a bit and realized it might make sense- especially since that is something Mike could do himself.  He had already helped friends of ours lay hardwood in their townhome when they were getting ready to sell, so diverting the full refinishing budget of labor & materials to buying new, high-quality flooring might actual give us a better bang for our buck (factoring in yet more sweat equity on the part of my dear, dear husband).

I was nervous about broaching the topic with him since he is still putting the finishing touches on several other massive projects he has worked in the past 7 months or so, but I should have known not to be.  Leave it to Mike to start getting antsy after a month or so away from a lumber supply or wholesale showroom.   He immediately spent an entire day researching and dragged me to a flooring showroom that night (Tuesday), to take a look at hickory samples (the material he decided would be the right balance of quality within our budget).

We got quotes from the showroom and from a few online suppliers, and Mike was bugging me to go look at more samples and make a decision so he could order and get to work.  It was now Wednesday.  I woke up with a nasty head cold, my parents were arriving that afternoon, I had to get my Christmas baking done.  Also, I was (and still am)~8 months prego.  I asked for a reprieve to get through Christmas before we had to make any decisions.  Mike begrudgingly relented (although it didn’t stop him from a few more trips to look at samples on his own).

After a few extra days to think about it and plan, we still haven’t come to a decision.  The major complicating factor that has arisen is the fact that floors in the other bedroom upstairs appear to be basically new.  They are 2.25″ oak, like the rest of the house, but they are in noticeably better shape.

IMG_3223

Transition from old to new flooring in the bedroom- and a puppy head for good measure

I don’t think it would be wise to completely waste perfectly good floors, but it’s also very important that there be continuity throughout the house, so I suggested we install oak floors and then sand & refinish the room above at some point to match.  Mike doesn’t want to spend all the time, effort and money and not change/upgrade the look at all, which I understand.  However, I think for resale (and our sanity), it would make sense to have more continuity throughout.  I’ve even started wavering back to the repair & refinish route, instead of replacing.  I’ve spent a lot of time googling and haven’t had much luck, but based on the few forum topics I’ve stumbled upon, it seems most people tend to agree with me.

So here is where we are at with our options:

  1.  Repair & refinish (~3500-6000, depending on contractor)
  2. Replace everything except the bedroom where the floors appear to be basically new & have one room mismatched (~5000 + Mike’s time & effort, not including the stairs)
  3. Replace everything and have continuity throughout (~6000 + Mike’s time & effort, not including the stairs)
  4. Replace everything except the good bedroom with Oak & have continuity throughout (haven’t gotten any quotes yet but likely would be on the order of #2, possibly slightly less expensive)
  5. Abandon ship, get big area rugs, and spend our time getting everything set up for baby’s impending arrival.  (floors will likely never get done until we up and move out of this house)

At this point, to channel my inner basic b*tch, I literally can’t even.  This homeownership stuff can be a real drag sometimes.   The Systems Engineer in me can do a quick decision matrix in my head and tell you that option #4 is likely the most sensible one to go with, but the wife in me can do similar calculations and conclude that there is no way I’m getting my husband on board with that one.

So, in conclusion, from Love & Elbow Grease –  HELP!!!

Operation Curb Appeal Part Two- So long, shanty awning

As I mentioned in my inaugural post, we had a particularly hellish house hunt (think 9 months, 5 offers, and nothing but bidding wars…).  We ended up with our cute little house in a great neighborhood and an AWESOME yard, and while it was definitely “move-in-ready” it also provided us PLENTY of opportunities to freshen things up a bit.  Case-in-point was what we dubbed as the “Shanty Awning”.   I used to describe our house to people by saying “It’s the little blue one on the road to the park, with the ugly brown shutters and the awning that looks like someone floated to the U.S. from Cuba on it”.  People would laugh, but then once they saw it, would wholeheartedly agree.  Here it is, in all its glory:

That’s my wonderful hubby diligently working on some landscaping in the spring, since there were literally NO plants in the front (see Operation Curb Appeal- Part One).   Maybe the previous owners thought shrubbery would take away from the magnificence of the shanty awning?  I guess we’ll never know- but I digress.  It’s obviously ugly.  We hated it from day one.  However, we really didn’t want to take it down without replacing it because it WAS pretty clutch having cover when it was raining out (for both us and the bird family that was living in it), and hiring someone to build a new portico would have been really pricey.   Thanks to the confidence instilled in DH by his friend Joe, an architect, who told him what fasteners we would need and said “you can totally build that yourself”, we (he) took on our (his) biggest project yet!

Being the enginerds that we are, we started with a plan.  Mike downloaded SketchUp, a free google program for engineering models/drawings, and drew up the front facade of the house.  It was a really useful but admittedly not very user friendly.  I got a little ambitious and tried to draw up our full floor plan in a separate file and I couldn’t figure it out, and I do have experience with engineering graphics software (it was 9 years ago, but still).  However, my wonderfully smart and hard-working hubby put in the time to figure it out.   After playing around with dimensions and materials, we settled on the general style/form factor below.  Don’t mind our improperly sized door and light fixture screen shot- we’re not professionals here.

Mike took the plans, based on the SketchUp drawing and general information on the up-to-code fasteners and supports he would be using, to the building inspector to get a permit.  The town engineer had a few suggestions/changes and gave us the go-ahead.

Then came the fun part- demo.  While on all the shows on HGTV, demo day IS the fun day- but I use that term VERY sarcastically. We really should have had a camera crew on site, because true hilarity ensued and nobody got to witness it.  We managed to disassemble the awning (I tend to use the term “we” loosely but I did help!!) to the point where it was no longer really attached to the house, and was supported by a few 2x4s perched underneath coming up at an angle- image below.

IMG_3004

No birds were harmed during the demolition of this structure

We had a fool proof plan.  Mike was going to stand under what was left of the awning and support it with his man-muscles and brute strength, while I removed the wood supports and got out of the way so he could toss the metal carnage onto the lawn.

However, as soon as I removed one 2×4, the shift in weight caused the other one to fall onto the ground at the foot of the stairs.  I froze, as Mike stood literally holding a gigantic, heavy mangle of metal parts over his head.  This was not part of the plan!  What do I do?  Do I go pick it up? I didn’t have to think on it too long before a bellowing “MOVE!” came out of my hulk-husband’s mouth, which I promptly did, and he walked down the steps, tossed the awning onto the lawn, turned to me in disbelief and asked me if I was trying to kill him.  We still laugh every time we think about it.

IMG_3003

There’s a hole in my roof

Then, he set to work on building.  The picture above shows initial progress of removing some of the roof for the interface of the new structure.  The hole is so the beam at the top of the portico could tie into a beam in the house.  One of our neighbors joked that our house may blow away in a storm but that portico will stay standing, and he is probably right!  Honestly, Mike completed this project so long ago that I know I’m missing a bunch of details and pictures. So, to skip over the rest of the details that are boring and/or I forgot, here are two big lessons we learned throughout this project (after the demo day debacle):

  1. Know your abilities:  Mike and I thought that the two of us, equipped with just the ladder pictured above and a metal folding chair, would be able to get the top beam into place.  The beam had to have weighed over 100 lbs, mind you.  It was clear basically immediately that I was an insufficient helper and that we were ill-equipped to get the task done, but Mike didn’t give up until I literally yelled “I refuse to work in these conditions!” and went inside.  I think it was when he suggested I use another piece of wood to support the beam while he maneuvered it into place, which brought immediate images into my head of  a 100+ lb beam cracking my head open as it inevitably fell off the piece of wood I was attempting to support it with.  Our friend Matt came over later that weekend with an a-frame ladder, additional man-muscles, and fewer inhibitions and the job got done.  Mike even admits that with a better suited helper and more appropriate equipment it was still tough to get done, so I consider myself vindicated.  Next time, I’m calling my union rep.
  2. Measure everything.  And then measure it again:  Prior to the columns being installed, which was one of the last things to be done, the top structure was supported by temporary supports (sistered 2x4s on each side).  When the cuts were made to install these support structures, we were very embarrassed to realize that two engineers with masters degrees in Systems Engineering made the rookie mistake of making assumptions and not documenting measurements.  Basically, the porch is graded away from the house (which makes sense for water management, duh).  However, the temporary support posts were cut under the assumption that the porch was level and their length requirement was the same as the measurement up against the house, and did not account for the porch’s slope, and were too short.  It’s amazing how such a slight gradient makes such a big impact over the course of ~6 feet.  In hindsight, we probably could have just made another trip to Home Depot but that just felt like too much to deal with at the moment, and instead we spent 2 hours arguing and coming up with a work-around with the scrap wood we did have on hand.

I’m sure there were a million other things that we learned along the way, but those seem to be the most memorable.  It’s a year later and there are still some finishing touches left lingering (railings, some trim pieces, etc), but like many of the small details at the end of all of our projects, they’ve been de prioritized.  The “finished” product is below!  What a difference it has made for the whole look/feel of our home!

IMG_0015

DIY success! 

If you were worried about the displaced bird family, fear not- to our surprise, they returned and took up residence in the new structure.  I wonder if they’re impressed with their upgraded digs.  Maybe I’ll have to work on a bird house project this spring!

Summer Renovation Plans

We have had quite a whirlwind of activity this spring, and I can’t believe it’s already Memorial Day Weekend!  We have a bunch of work planned in the house this summer, some of which is already completed or in progress.  I will hopefully get around to writing detailed posts on each of these projects, but in the meantime I figured I could provide a high-level summary of what we are working on!

Beefing Up Structural Support in our Living Room Ceiling:

When we bought our house, I noticed during the inspection that there was a dip in the floor in the bedroom on the left side upstairs.  I went back down and took a look at the ceiling in the living room, which was directly below, and it was also noticeably not level.  It seemed like someone had removed a load bearing wall at some point and not resupported to account the load that the wall carried.  While we were assured it wasn’t anything to be alarmed about, we worked with our realtor and a friend of the family who is a contractor to get an estimate for the work required to rectify the issue, which would entail opening up the ceiling and sistering stronger support components to the existing structure.  We were able to negotiate a credit at closing to cover the costs.  We finally got around to getting it done ~1.5 years later.

This is actually one item we can check off our list!!  Big thanks to Dave Breuder at Breuder Home Improvements for giving us peace of mind!!!

Recessed Lighting in the Living/Dining Room:

Since we already had to open up the ceiling, we wanted to take the opportunity to install recessed lighting.  The only places in our house that currently have any overhead lighting are our kitchen, bathrooms and hallways.  Our bedrooms, living/dining space and office are so dark and it’s a major problem- to the point where we end up moving lamps from other parts of the house when we are entertaining.  Sometimes it’s the little things that you may not notice off-the-bat when you’re house hunting that will end up really driving you nuts down the line!!! Because we use the living room as a living/dining combination, we are putting a fixture over our table as well, instead of recessed lighting throughout.

This is in progress, and Mike, aka Super-Husband, has done all of the wiring and installation himself.  Jack-of-all trades much?!

Removing the Built-Ins and Adding French Doors to the Back Porch:

Again, taking advantage of the disarray that would be inevitable giving the structural work happening in our living space, we decided to bite the bullet and begin a project that we really went back and forth on.  Along the rear wall of the space, there is a door to a sun room/porch, with built-ins surrounding on either side.

923383_669162631038_2013012241_n

Before!

I LOVE built-in shelves for their character and function in general, especially in older homes, but our built-ins really weren’t especially nice.  Additionally, because we use the room as a dual-use space, eating up ~26 square feet of floor space with built-ins that were 24+ inches deep wasn’t optimal.  Lastly, the door that was currently there wasn’t a proper exterior door, was super drafty, and also didn’t allow for very much natural light in the space.  We really loved the idea of adding french doors for an up-scale, classic impact.  Thus, our brainstorming resulted in demolishing the built-ins and making room for 5′ of french doors.

IMG_1683

In-Progress (my life is a swirling vortex of entropy)

We picked up the doors yesterday and hope to get the framing done sometime in the next two weeks.  This is another area where Dave Breuder will be helping us out.  We love to DIY but when it comes to structural type stuff, we think it’s much smarter to consult a professional!

Refinishing our Floors:

We had been considering this for awhile, but removing the built-ins has given us the kick in the pants we need to bite the bullet and do it.  We needed to do it sooner than later regardless, but we definitely need to sand the area that used to be under the built ins to be level with the rest of the floors immediately.  We also have a few unfinished steps at the bottom of our stairwell and have not yet succeeded in finding a matching stain to the rest of the stairs or floors.  We are concerned with logistics of the floors, because 1.  our house is not an easy place to relocate furniture within and 2. we have active dogs that we are worried will ruin them immediately.  We are leaning toward hiring professionals for the floors because of these reasons, and also because I’ve read that even the savviest DIY-ers can have trouble when refinishing floors.

Things on our “Maybe” List:

Rebuilding the Porch and Adding a Deck:

If you ask Mike, this is on our “definitely” list, but I think we will have to see how the rest of the summer plays out.  The porch off the dining area, which we call “The Shanty Porch”, does desperately need to be repaired, and adding a deck next to it would really bring more continuity to our outdoor space and access to our kitchen. We currently have a paver patio off the kitchen and next to the porch, but the two spaces are very disjointed.

IMG_1685

Shanty Porch (not to be confused with Shanty Awning)

I’m still not convinced we shouldn’t add living space on to the back of the house so I’m hesitating to pull the trigger.  The plans that Mike drew up are looking pretty epic though, so maybe we should just go for it!

IMG_1684

Grand Plans!

Kitchen Refresh:  

My kitchen is my least favorite part of our house.  It’s small, closed off from the rest of the house, has no room for seating and consequently has become the bane of my existence.  If we were to open it up to the bedroom that’s next to it, we would be able to pull off a more open-concept kitchen/dining space.  However, bringing the house down to two bedrooms is not smart for resale value (hence my hesitation to take adding on off the table that I mentioned above.)  However, we found a designer kitchen online that served as inspiration and made us feel like we could actually make our kitchen work better without changing the footprint.

We started looking into replacement countertops, floors and backsplashes, and things were really looking up!  However, once I stopped focusing on how much I hate my countertops and the fact that there is no seating in our kitchen because solutions were on the horizon, I realized how much I truly hate my cabinets.  They are white, and at first glance, not offensive- but they are cheap, poorly laid out and now I can’t stand the thought of spending money to put beautiful countertops on top of them. So, we are putting off decisions in that area for the time being.  Basically, we need to decide how much we are willing to invest in the kitchen in it’s current footprint, because even with improvements in functionality and aesthetics, it will still be far from an ideal kitchen.

I think that’s all that we have for now.   I’ll throw in a picture of what our yard looks like currently for good measure, since Mike doesn’t want to get a dumpster until we demo the porch.

IMG_1686

I think I’ll call this one… “Gonna vom”

Is anyone else taking on Summertime renovations?  Am I the only one whose home is a swirling vortex of entropy?

What kind of projects are you taking on this Summer?

Have you ever had to make tough design choices?  

What are the things you didn’t think about when you were house-hunting but completely and totally drive you nuts now that you are in your home?  

Operation Curb Appeal Part One- Landscape Overhaul

As I mentioned in my inaugural post, we had a particularly hellish house hunt (think 9 months, 5 offers, and nothing but bidding wars…).  We ended up with our cute little house in a great neighborhood and an AWESOME yard, and while it was definitely “move-in-ready” it also provided us PLENTY of opportunities to freshen things up a bit.  Most notably, it was severely lacking in curb appeal.  The shanty awning, the lack of landscaping, the powder blue siding and poop-brown shutter combination- it certainly seems like years of poor decision making and lack of effort really took its toll on our poor little house.

IMG_1435

Curb appeal fail.

We didn’t have delusions of grandeur- recovering financially from buying the house and all of the wedding and honeymoon expenses was not going to allow us to jump headfirst into any major projects.  The first thing we did was paint the shutters.  We admittedly did not end up with as dark of a blue as we had hoped, but after some close calls on the ladder due to a standoff with the wasps that had taken up residence behind them, Mike was not exactly volunteering to hop up there and redo it (and it still looked better than it did before).

The next thing we thought we were ready to tackle was adding some curb appeal with landscape improvements.  We are very fortunate to have many multi-talented people within our network of family and friends, and our awesome friend Dave spent several years running a landscaping business and he kindly lent us his ideas, time, pick-up truck and elbow grease to get us started.  The first thing that they did was prepare landscape beds and build a small stone wall to give the space a little bit more “oomph”.

Once the area was prepared for planting, it was time to get to our local garden supply to pick out our greenery.  I am warning you right now, if you are taking on a ground-up DIY landscaping project- DO YOUR HOMEWORK.  Mike and I have proven to be less than stellar at plant planning and selection.  There are so many plant choices and sizes, and it’s worth the extra time up front to get a real strategy on what exactly you are going for.

photo (1)

Front garden beds & our first shrubs!

We had originally planned on a few boxwoods on each side and if you’ll notice in the photo above, there are two boxwoods on the right.  Fast forward through a few more trips to Morris County Farms and poor Mike was digging one of them up and planting it on the other side to make way for larger, more cost effective plants once we realized how slow-growing AND expensive they were.  “Sure, this will grow into exactly what you want it to be in 5 years, but it will be super tiny until then and cost you a billion dollars today.”    I do worry that we lost sight of the big picture, but the nice thing about gardening and landscaping is that you can always add, replace or attempt to move things around (much to Mike’s dismay).  We added some burning bushes, peonies, a variegated shrub, and a bunch of other plants that I don’t even know the name of at this point.  Our track record with plants up until this point had resulted in me dubbing our home as “the place plants go to die”, so I’m just happy they survived.  Except the Rhododendron… RIP Rhododendron.  (FYI, if you plant a rhododendron, fertilize sparingly, if at all.)

To circle back to my point about planning ahead and doing your homework… seriously, do it.  Also, don’t be afraid to ask questions.  We still haven’t fully learned our lesson, and on our last trip for a tree and a few filler shrubs we found ourselves in our familiar nightmarish situation, frantically looking at tags for how large things grow, googling whether they were deer resistant, arguing the merits of Autumn Brilliance or a Juniper tree.  Every trip inevitably ends in me saying, “I’m (hungry/tired/hot/bored) and I want to go home,” (which I may have picked up from my three-year-old niece), a hasty purchase of whatever random conglomeration of plants has wound up in our wagon, and a silent ride home.  Consider this a Public Service Announcement-  don’t do the farm and garden store like we do.  All you’ll end up with is shame, and a front landscape that you refer to as “the jungle”.

There are a ton of websites out there that provide a wealth of knowledge on different types of plants, tips for layouts, example landscapes, etc, so to reiterate my “plan ahead” point above, research beforehand and understand all of your constraints and you’ll limit rework and end up with a more optimized result. These are best practices that we both use in our jobs as engineers on a daily basis, but we have learned the hard way several times as homeowners that if you cut corners in planning, you WILL get burned.  For example- ask your wife if the holes you dug are too close to the house before you plant anything, or you will end up replanting them.  Not that that happened to us or anything…

Despite our trial-and-error approach last year, now that Spring has sprung and everything has started to bud and bloom I have to say overall I think the result is simply beautiful.  It’s certainly an improvement from the baseline!  It is definitely a work-in-progress and will evolve over time but I’ve come to love our little mismatched jungle.  Doing the work ourselves and trying to choose shrubs that would be aesthetically pleasing as well as cost-effective, it was a relatively small investment for a large impact (I would estimate we spent somewhere between 1500 bucks but Mike would probably have a more accurate number).  Before and after picture below shows the original picture juxtaposed to what the house looks like as of a week ago, after adding a Juniper tree on the left and white hydrangea on each end (which I am hoping will bloom for us this year, but may not because they were just planted).

IMG_1436

Before & After!

Obviously there is another big change between the before and after- we ripped the shanty awning down one Friday night in August on a whim, and we designed & Mike built a portico in its place.  I will write about that in a future post:  Operation Curb Appeal Part 2- So Long Shanty Awning!

“maybe Christmas, perhaps, means a little bit more…”

Haven’t been keeping up with posting on here at all like I was hoping to, but have resolved to try harder in the new year (hello, 2015!!!)  Our first holiday season as a married couple has come and gone, and it was truly a whirlwind (but a good one!).  I started packing up some of my Christmas decorations, and was feeling super nostalgic. Most of my decorations are hand me downs from my mother that I acquired in the process of cleaning out my parents’ home this summer after they sold it to start a new adventure.  I have definitely purchased some items here and there but nothing has brought me greater joy than displaying the ceramic Christmas Tree that my Grandmother made for me in her crafts class, hanging the hand-made wreath my sister-in-law made us last year in the hallway, or ceremoniously progressing my childhood advent calendar from 1-24 (although my fur-kids didn’t seem to really get it.  hopefully one day we’ll have some human-kids that will!)

photo (4)

Childhood-Turned-Forever Advent Calendar. Yes, the date-marker is a mouse. I love this thing.

Our tree is covered with ornaments that were given to me by dear friends and family at my bridal shower, where one of my genius bridesmaids suggested a Christmas Tree “Wishing Well” in lieu of a traditional one, with guests bringing an ornament instead of a small household item.  I have to tell you, not only was I floored by such a thoughtful, useful and beautiful gesture at the time, but it is something I will cherish, remember and relive every Christmas for the rest of our lives.   Our tree is topped by a creepy angel that I found in one of the many boxes from my parents’ house, that my husband can’t stand the sight of (which I naturally find hilarious).  And I can’t tell you how many times he has asked me, “Where did THIS come from?”, while holding up a random hand-me-down chotchkie- most notably, the two strange Christmas rabbits that we had to put away early because Ellie started barking at them non-stop and we couldn’t take it anymore.

photo (5)

Really can’t blame the dog for being frightened…

I have to say, my favorite bit of Christmas decor this year was actually a happy accident.  I was looking around for a card tree and couldn’t find any that felt “right”.  We dug out the twine/clothespins that we used to hang up photos at our wedding, replaced the pictures with holiday cards, and hung them in the hallway as a “good-enough” solution to tide us over for this year.  I absolutely love it.  I can’t wait to collect cards and hang them proudly in this way for years to come.

photo (6)

Our accidental, imperfect card display. And I wouldn’t want it any other way.

The tree didn’t turn out the magazine-perfect display of white lights and gold ribbon that I had pictured.  One of my husband’s presents was only covered with paper, and not actually wrapped, because I lost the tape on Christmas Eve and gave up.  I still haven’t figured out how to masterfully prepare and time several different dishes that require different temperatures and durations in the oven, so I’m sure many of the dishes we served to our families on Christmas Day were lukewarm (or overdone).  But, we were surrounded by family.  Our home was filled with constant reminders of our loving, supportive family & friends.  Tokens of Christmas’s past. Promises of Christmas’s to come.  We are so blessed.

One of my favorite Christmas-movie moments is from “How the Grinch Stole Christmas”, when the Grinch realizes that Who-Ville was celebrating Christmas in the absence of all of the treasures he stole from them.   Thank-you, Dr. Seuss, for your words of wisdom, delivered by a scary green monster, that really capture what the holiday season is all about by identifying what it’s NOT about.

“It came without ribbons. It came without tags. It came without packages, boxes or bags. And he puzzled and puzzled ’till his puzzler was sore. Then the Grinch thought of something he hadn’t before. What if Christmas, he thought, doesn’t come from a store? What if Christmas, perhaps, means a little bit more?”

Wishing everyone a happy, healthy 2015!

My DIY Debut

So I started this blog a long time ago and only managed to write one post.  My bad.  In my defense, between working on our home, our wedding, going on our honeymoon and getting settled back into a routine (as newlyweds!!!) time has gotten away from me even more than it normally does.  I figured that I would talk about my favorite wedding craft… our card box!

I, like many brides-to-be, spent a lot of time swooning on Etsy at all of the beautiful handmade items that might just add a special air of whimsy or romance to my big day.  I absolutely LOVE anything that displays a whimsical quote or something of the like, so when I saw a rustic, weathered card box that read “Every Love Story is Beautiful But Ours Is My Favorite” on the front, I was sold.  Then… I saw the price.  I started looking around and found that most of the card boxes I was finding online ranged from around 80 bucks all the way up to 250 bucks for more intricate designs.  I was shocked!  The one I fell in love with was listed for around 115 dollars.  Despite shelling out the big bucks for certain parts of our budget (we dropped more on photo and video than I was able to scrounge up for a down payment for my car just a few short years ago) I was not going to go overboard on unnecessary details.  I’ve never been a particularly artsy person but I decided to hit up the craft store and see if I could make my own version for a more reasonable cost.  It was, admittedly, the first crafty DIY project I’ve ever taken on (at least in my adult life!).

I will lay this out up front:  it still wound up being somewhat expensive for the supplies, which included the wood box and materials to do the “rustic glaze” that I found on the super helpful blog post below:

How to Make New Wood Look Old, Weathered and Rustic

The glaze calls for 4 parts Valspar clear mixing glaze, 2 parts of the mocha glaze and 1 part of the antiquing asphaltum glaze.   I actually just searched google images for the quote, and found a picture of a sign I liked.  I originally intended on tracing the outline of the quote and then painting it, but soon discovered that I would have spent the rest of my life doing that, so ended up just eyeballing it.  It’s definitely imperfect and I would certainly have to fine tune my skills before opening up my own Etsy shop but I was very happy with the result.


unfinishedboxfinishinginsidefinished drying

The three glaze ingredients ran me about 43 dollars at Lowe’s (the only place I could find Valspar products) and I didn’t have time to shop sales, look for coupons or any of the other tips and tricks I would normally employ.  The wood box was 19.99 and the acrylic paint for the text was about a dollar, so all in all I spent around 65 bucks- but I have enough rustic glaze to weather pretty much anything I could think of.  So it looks like I have to craft some more… the next project I would like to tackle is refinishing a garage sale coffee table my husband picked up years ago for about 15 bucks- so hopefully I will be posting the end result of that in the near future!

Despite the investment in the ingredients being a little bit more than I would have originally anticipated, I have plenty of materials for future crafting (yay!) and, most importantly, the end result was beautiful (and we can display it in our home for years to come!).  All it took was a little elbow grease 😉

AZS-S-325


Love & Elbow Grease

While in the process of planning our wedding and purchasing our first home, my soon-to-be husband and I found ourselves hemorrhaging money.  We work hard and are in a good place financially, but we both come from hard-working blue collar families and the price attached to a lot of the things we were looking for was pretty tough to swallow.  I appreciate luxury but am practical to the core, so “keeping up with the Jones’,” at costs that make no sense, was something I have no interest in.  Some examples can be found below:

The wedding venue:  We looked at a few places but we (mostly he, actually) fell in LOVE with the venue where we ultimately booked our wedding ceremony and reception.  It was unique, rustic and beautiful.  They only do weddings on Saturdays and Sundays, and had very little Saturday availability.  So, the fact that we would have had to wait an additional 5 months PLUS spend 10 grand more for a Saturday wedding made the choice to do a Sunday in March (gotta love an off-season “bargain”!) fairly easy.

The wedding extras:  Being blown off by a florist after telling her I didn’t want to spend more than 3K on flowers (newsflash:  flowers DIE!!!).  $275 for a BELT.  Thousands of dollars on photo and video- some packages only including one photographer! 125 bucks for the stupid rustic card-box I fell in love with on Etsy?! 1100 dollars for up-lighting?!?!  Everything wedding seems to be impractical and over-the-top.  We prioritized and did splurge in some areas, because it is hard not to get carried away with certain details for your wedding.  However, we were shocked to find out that booking our venue would not be the most taxing part of the wedding planning process, and decided that we would not spend needlessly outside of the things that we thought mattered (food, drinks, music and photography!).

The house:  We had a long house-hunting process.  8 months of looking at houses, putting in offers, and enduring bidding wars.  We were some of the lucky ones who entered the real estate market just as it was shifting from a buyer’s to a seller’s- every single house we bid on had multiple offers, and each sold for over asking price.  We actually offered 10K over asking on a house and ended up being outbid by 35K!  It was stressful, and seemingly endless, until we finally found our little home near the park that is absolutely perfect for us!  I’ll be posting a lot more on our house in later posts, but it’s a modest home in a great neighborhood that was the perfect balance of “move-in-ready” and “room for improvement”.  We experienced a lot of sticker shock at what we could get for our money in such a desirable area, but in the end didn’t let ourselves get caught up in the stress and made a decision that made sense from both an investment and lifestyle standpoint.

The moral of the story is, especially in this day & age where everything gets posted on social media and people have something to say/judge about every nuance of life,  it’s easy to get caught up in things that really don’t matter.  I’ve decided to start documenting some of the projects we’re taking on to build the life we’ve always dreamed of together, without completely breaking the bank.  Feel free to share in our journey! We believe that we can do it with lots of love… and a little elbow grease.