As I mentioned in my inaugural post, we had a particularly hellish house hunt (think 9 months, 5 offers, and nothing but bidding wars…). We ended up with our cute little house in a great neighborhood and an AWESOME yard, and while it was definitely “move-in-ready” it also provided us PLENTY of opportunities to freshen things up a bit. Case-in-point was what we dubbed as the “Shanty Awning”. I used to describe our house to people by saying “It’s the little blue one on the road to the park, with the ugly brown shutters and the awning that looks like someone floated to the U.S. from Cuba on it”. People would laugh, but then once they saw it, would wholeheartedly agree. Here it is, in all its glory:

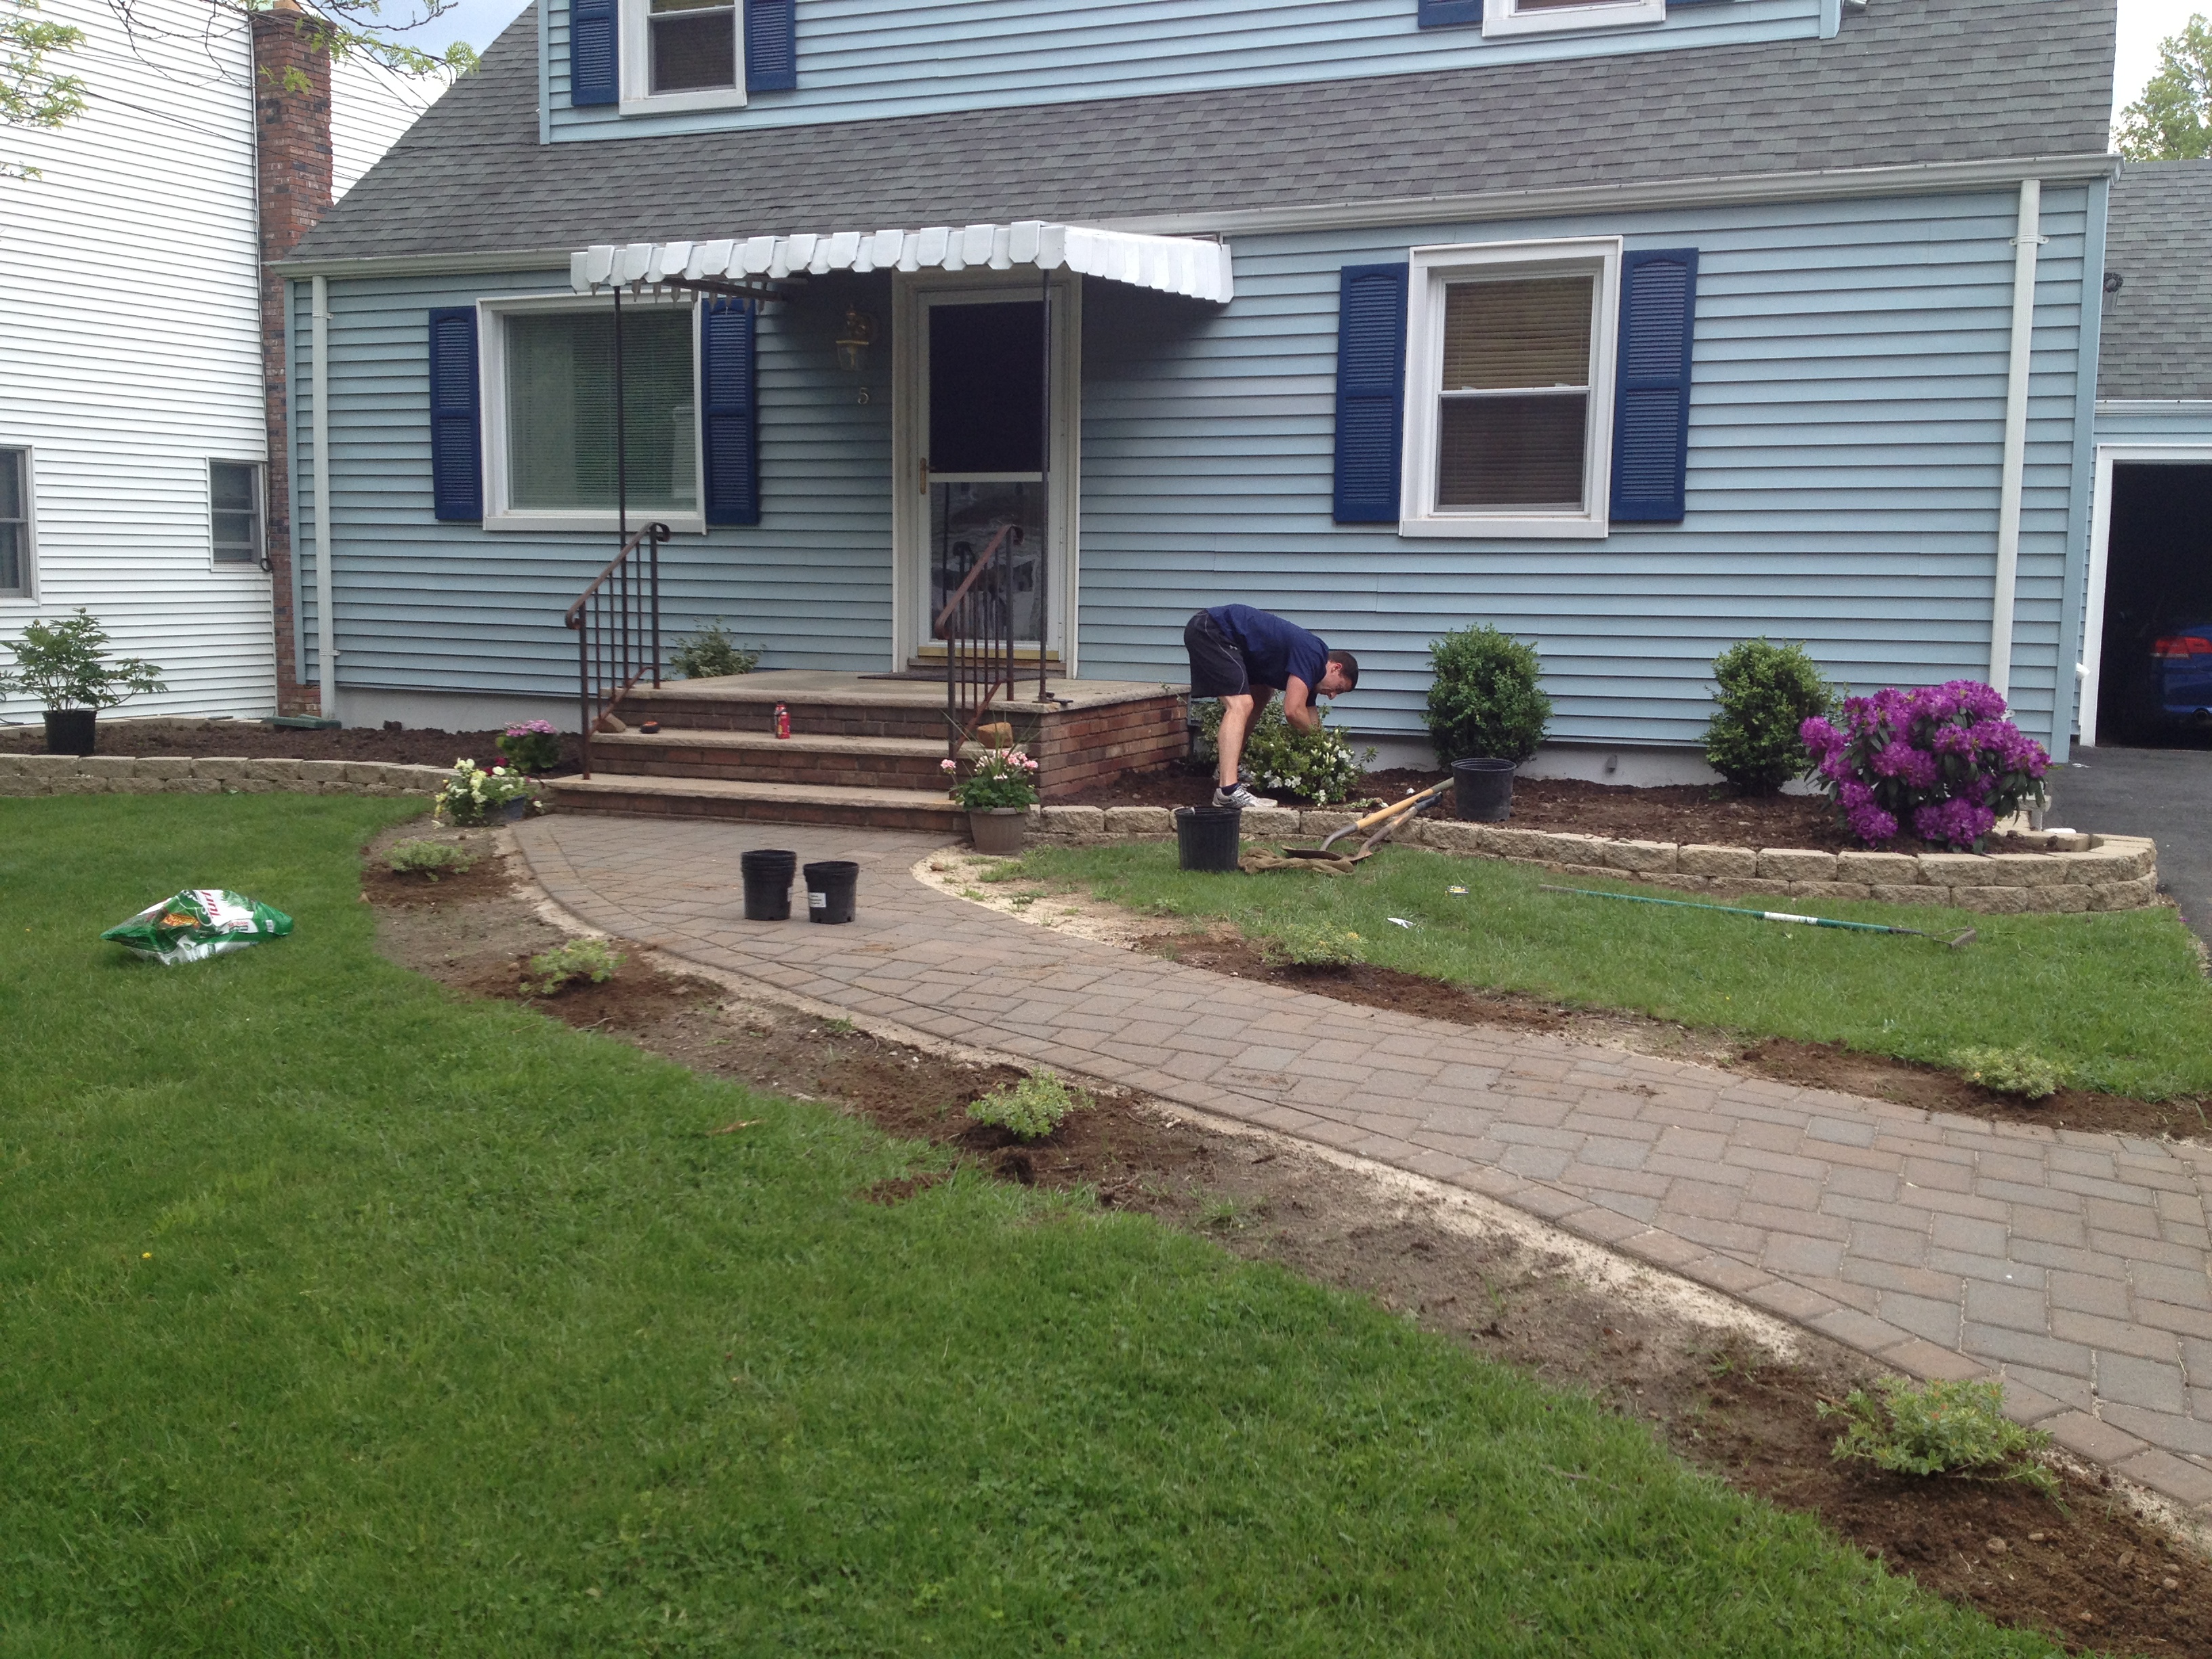
That’s my wonderful hubby diligently working on some landscaping in the spring, since there were literally NO plants in the front (see Operation Curb Appeal- Part One). Maybe the previous owners thought shrubbery would take away from the magnificence of the shanty awning? I guess we’ll never know- but I digress. It’s obviously ugly. We hated it from day one. However, we really didn’t want to take it down without replacing it because it WAS pretty clutch having cover when it was raining out (for both us and the bird family that was living in it), and hiring someone to build a new portico would have been really pricey. Thanks to the confidence instilled in DH by his friend Joe, an architect, who told him what fasteners we would need and said “you can totally build that yourself”, we (he) took on our (his) biggest project yet!
Being the enginerds that we are, we started with a plan. Mike downloaded SketchUp, a free google program for engineering models/drawings, and drew up the front facade of the house. It was a really useful but admittedly not very user friendly. I got a little ambitious and tried to draw up our full floor plan in a separate file and I couldn’t figure it out, and I do have experience with engineering graphics software (it was 9 years ago, but still). However, my wonderfully smart and hard-working hubby put in the time to figure it out. After playing around with dimensions and materials, we settled on the general style/form factor below. Don’t mind our improperly sized door and light fixture screen shot- we’re not professionals here.

Mike took the plans, based on the SketchUp drawing and general information on the up-to-code fasteners and supports he would be using, to the building inspector to get a permit. The town engineer had a few suggestions/changes and gave us the go-ahead.
Then came the fun part- demo. While on all the shows on HGTV, demo day IS the fun day- but I use that term VERY sarcastically. We really should have had a camera crew on site, because true hilarity ensued and nobody got to witness it. We managed to disassemble the awning (I tend to use the term “we” loosely but I did help!!) to the point where it was no longer really attached to the house, and was supported by a few 2x4s perched underneath coming up at an angle- image below.

No birds were harmed during the demolition of this structure
We had a fool proof plan. Mike was going to stand under what was left of the awning and support it with his man-muscles and brute strength, while I removed the wood supports and got out of the way so he could toss the metal carnage onto the lawn.
However, as soon as I removed one 2×4, the shift in weight caused the other one to fall onto the ground at the foot of the stairs. I froze, as Mike stood literally holding a gigantic, heavy mangle of metal parts over his head. This was not part of the plan! What do I do? Do I go pick it up? I didn’t have to think on it too long before a bellowing “MOVE!” came out of my hulk-husband’s mouth, which I promptly did, and he walked down the steps, tossed the awning onto the lawn, turned to me in disbelief and asked me if I was trying to kill him. We still laugh every time we think about it.

There’s a hole in my roof
Then, he set to work on building. The picture above shows initial progress of removing some of the roof for the interface of the new structure. The hole is so the beam at the top of the portico could tie into a beam in the house. One of our neighbors joked that our house may blow away in a storm but that portico will stay standing, and he is probably right! Honestly, Mike completed this project so long ago that I know I’m missing a bunch of details and pictures. So, to skip over the rest of the details that are boring and/or I forgot, here are two big lessons we learned throughout this project (after the demo day debacle):
- Know your abilities: Mike and I thought that the two of us, equipped with just the ladder pictured above and a metal folding chair, would be able to get the top beam into place. The beam had to have weighed over 100 lbs, mind you. It was clear basically immediately that I was an insufficient helper and that we were ill-equipped to get the task done, but Mike didn’t give up until I literally yelled “I refuse to work in these conditions!” and went inside. I think it was when he suggested I use another piece of wood to support the beam while he maneuvered it into place, which brought immediate images into my head of a 100+ lb beam cracking my head open as it inevitably fell off the piece of wood I was attempting to support it with. Our friend Matt came over later that weekend with an a-frame ladder, additional man-muscles, and fewer inhibitions and the job got done. Mike even admits that with a better suited helper and more appropriate equipment it was still tough to get done, so I consider myself vindicated. Next time, I’m calling my union rep.
- Measure everything. And then measure it again: Prior to the columns being installed, which was one of the last things to be done, the top structure was supported by temporary supports (sistered 2x4s on each side). When the cuts were made to install these support structures, we were very embarrassed to realize that two engineers with masters degrees in Systems Engineering made the rookie mistake of making assumptions and not documenting measurements. Basically, the porch is graded away from the house (which makes sense for water management, duh). However, the temporary support posts were cut under the assumption that the porch was level and their length requirement was the same as the measurement up against the house, and did not account for the porch’s slope, and were too short. It’s amazing how such a slight gradient makes such a big impact over the course of ~6 feet. In hindsight, we probably could have just made another trip to Home Depot but that just felt like too much to deal with at the moment, and instead we spent 2 hours arguing and coming up with a work-around with the scrap wood we did have on hand.
I’m sure there were a million other things that we learned along the way, but those seem to be the most memorable. It’s a year later and there are still some finishing touches left lingering (railings, some trim pieces, etc), but like many of the small details at the end of all of our projects, they’ve been de prioritized. The “finished” product is below! What a difference it has made for the whole look/feel of our home!
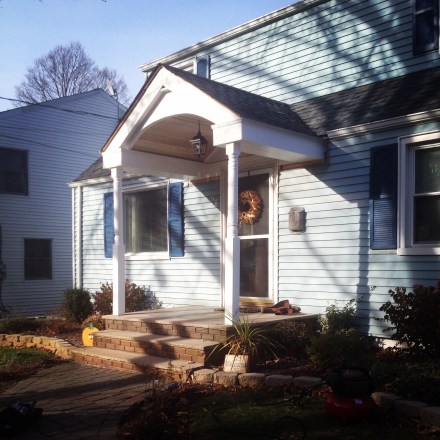
DIY success!
If you were worried about the displaced bird family, fear not- to our surprise, they returned and took up residence in the new structure. I wonder if they’re impressed with their upgraded digs. Maybe I’ll have to work on a bird house project this spring!

what a delightful blog kerri! … “us and the bird family that was living in it” – so happy to know they returned!